jetsetgreen
Showing posts with label delicious. Show all posts

Wednesday, December 11, 2013

Cinnamon Toffee Chocolate Chip Cookies

I like to create new recipes for the annual cookie swap my friends throw in December. This year I started with the Jacques Torres NYT chocolate chip cookie recipe as a model and then built on it. These cookies feel seasonal with cinnamon and toffee chips, studded with bittersweet chocolate, and a caramel-y dough. This is my way of saying that I will defend my title as Queen of the Cookie to the last crumb.


I love these cookies. The cinnamon in the dough isn't overwhelming, and the three different chips makes the cookie warm, sweet, and just stupid delicious. And wouldn't you know, I WON QUEEN OF THE COOKIE! You could win Queen of the Cookie, too, with this recipe. Unless you want to be King of the Cookie, or Imperator of the Biscotti. I don't want to put a limit on your dreams.

Cinnamon Toffee Chocolate Chip Cookies

17 oz Flour (3 2/3 cups)
10 oz Dark brown sugar (1 1/4 cups)
8 oz Granulated sugar (1 cup plus 2 Tbl)
1 ¼ c. Unsalted butter
2 Large eggs
1 ¼ tsp  Baking soda
1 ½ tsp Baking powder
1 ½ tsp Kosher salt
1 tsp Cinnamon
2 tsp Vanilla
1 ½ c Cinnamon chips (abt 1 pkg)
1 1/3 c.Toffee chips (abt 1 pkg)
10 oz. Bittersweet chocolate chips (abt 1 pkg)

Cream butter and sugars until light and fluffy. Add eggs one at a time and then vanilla. Mix all dry ingredients and add slowly until incorporated. Stir in all the chips. Refrigerate at least 24 hours, 36 is even better. Bake 375 for 8-10 minutes until golden. You could also sprinkle them with w/sea salt before cooking, add 1/2 tsp chili or cayenne powder, or 1/2 cup toasted chopped almonds to the dough. Yes, you need to let the dough chill for a day. Something happens to the sugar and the flour when it chills for at least 24 hours, turning the cookie caramel-y, crisp on the edges and gooey in the middle. Trust me.


Monday, February 25, 2013

Carina's Coconut Cream Pie


This is the recipe that people are always asking me for, especially around the holidays. I worked on the recipe for years, tinkering until it was the most perfect coconut cream pie anywhere. 

It's not stringy, or soupy, or--horror of horrors--full of almond extract (almond extract in a coconut cream pie is like putting mud in chocolate cake--don't put that in, that's a horrible thing to do.) 


When I was baking the empty pie shell I took a conference call. The conference call won. Oops.

I ran out of time to make another pie crust and I was under a serious time crunch. I had to take EG to piano right in the middle of the process and didn't have time to change. When I dropped him off I realized that I could just run to the store and buy a pie crust! People do that! Except the only store nearby was Walmart (which hurts my feelings.) And, oh yeah, I was wearing leggings as pants, slippers, a messy shirt, hadn't done my hair, had on no makeup. I was a People of Walmart, my friends.

But it was worth it...


I cooled the filling in a flash by going outside, sticking the pot in the three feet of snow on my back deck, and stirring as it thickened. It cut more than an hour off the chill time--awesome.

I use the Cook's Illustrated vodka pie crust because it never fails me. One tip that I'll tell you guys: I sometimes put 1/4 cup of the finely shredded coconut into the pie pastry. Just another level of awesome.


Friday, January 04, 2013

How to Make Empanadas

Last night I posted a picture on Instagram of my homemade empanadas and I had so many requests for the recipe, I figured making empanadas needed its own post.


Empanadas are usually meat-filled pies. The empanadas from Spain are typically made of a type of bread dough, are as big as a cookie sheet, and are often filled with salt cod (bacalao) or good tuna (they're delicious, swearsies.)  I'm teaching you how to make empanadas from Argentina today. Homemade empanada wrappers are usually more pie-crust like, but to save time I usually purchase the dough. I use La Salteña brand, which bake up flaky, like a lighter puff pastry.


You can find empanada dough at just about any Latin market in your area, in the freezer section. There are usually two types, "Freir" and "Horno", you want the "Horno" which mean "oven." You can fry the empanadas if you like (pick the "Freir" type) but I don't usually make them that way because I hate to fry. I buy two packages to make two dozen empanadas.

I usually make empanadas when I have meats or vegetables from another meal that I want to use up--like a Sunday pot roast. You can certainly make them with ground beef (very traditional) that you've browned before adding the veggies, or any other meat. Any mix of meat and vegetables will work, feel free to substitute for what you have on hand. If they're already cooked, just dice and fill your wrappers. And no one will stop you if you decide to fill them with all veggies.

Empanada Recipe

2 cups of cooked meat (I used leftover diced turkey)
1/2 onion, diced
Two small potatoes, diced
1 cup small diced celery (about 2-3 stalks)
1 cup small diced carrots (about 2 carrots)
1/2-1 cup of frozen peas
2 hardboiled eggs, chopped
1/2 cup diced olives (optional, black or green)
Olive oil
Salt and pepper
Herbs and seasonings

Optional: 1 yolk and 1/4 cup cream for an egg wash

Set the wrappers on the counter to thaw (or leave them in the fridge overnight.) Preheat your oven to 375 degrees.

Heat two tablespoons of olive oil in a large skillet (about 12") over medium heat and add potatoes. Saute them for 5 minutes, then add the onion, cooking for another 5 minutes until both are softened. I've been known to throw a couple tablespoons of homemade salsa into the mix as a type of sofrito (not specifically Argentinian, but tasty.) Add the celery and carrots and cook for another 5 minutes. Salt and pepper the mixture. Toss in the cooked meat until heated through. Season with your favorite herbs or seasonings, like pimenton or dry chimichurri (I'll often use a Sazon Goya seasoning packet, which you can also find at the Latin market.) Really, the mixture should just taste good to you. Remove from heat and put into a large bowl. Add the eggs, olives, and frozen peas. Taste and season with more salt as necessary. 

Set up your wrapping station: a cutting board where you can lay your wrapper on, a small bowl of water, and a parchment-lined sheet pan. 

Using your fingers, wet the edge of the half the wrapper with the water. Fill each wrapper with about 1/4 cup of the filling mixture. You want to fill it up generously, but make sure the filling doesn't touch the edge (makes the edge hard to seal.) Crimp and fold the edges. It doesn't have to be fancy, you just want to make sure they're sealed. Place on the sheet pan. Repeat until you've filled up the pan and you're out of filling*. Lightly poke the top of each empanada with a fork to vent the pies. You can mix one egg yolk with 1/4 cup cream and brush the tops of the empanadas to give them a more golden color, but you don't have to.

Bake 25-30 minutes until golden brown. They will be hot, so be careful to let them cool slightly before eating. You can refrigerate the extras for several days in foil or tupperware. They're good cold or warm.

*If you run out of filling and still have a couple wrappers, fill them with jam or a little fruit and bake the same way


What do you think? Ready to make empanadas?


Monday, October 15, 2012

Apple Cider Donuts


I'm over at TodaysMama with a recipe for apple cider donuts from one of my favorite bakeries, Les Madeleines in Salt Lake City. The donuts were a huge hit at our house. Lulu helped herself to seventeen in a row, and then hide the rest around the house in case she got peckish later. I hope that they are still there in November so the mice are well fed and cozy.

Sunday, October 07, 2012

Recipe for Runzas

Several years ago, my friend Lisa described moving to Utah to school from the Midwest. What she, and her friend Wendy missed most about Nebraska were the cabbage and hamburger-stuffed buns called runzas. Runzas are kind of like Hot Pockets, but are actually tasty and not horrid. They tried many times to replicate their memories of a soft, almost sweet dough with savory filling, only to fail time after time. It was my turn to bring Lisa dinner after the birth of her last child, and I was determined to find a good runza recipe to make as a special treat. I went down to Borders Books (when there was such a thing) and found a recipe for runzas in America's Best Lost Recipes. They were delicious. I made them for Lisa, and I've been making them for my family ever since. Runzas are one of my husband's favorite dinners.


Some Notes: 
I usually double this recipe, because as long as you're making them, you might as well make 20 of them. I don't double the ground beef, but I do use the whole head of cabbage. While I respect the humble seasoning of this peasant dish (really, runzas come from Volga Germans, who settled in Russia and then immigrated to the Midwest,) I can't help but spice up the filling with whatever I have on hand. I've used a dry chimichurri spice, or a mix of paprika and other savory spices. Generally, I just throw spices in a little at a time and taste the filling as I go. The dough is on the sweet side, so a savory filling works best, but you could sub in all kinds of other fillings with whatever mix of meat and vegetables you might have. I'll chop up green olives, hardboiled eggs, or anything else I might have, too (I prefer a more empanada-type filling.) I bet you could fill it with BBQ pulled pork and it would be outstanding. The regular recipe is supposed to make 8 runzas if the dough is divided evenly, but I usually just eyeball the pieces of dough, making smaller buns for the kids and larger ones for grownups, so you can get about 10-12 buns out of a single recipe. If I remember in time, I will go to the deli and ask for American cheese slices, it really does melt well. However, I'm just as likely to use cheddar, or any other cheese I have on hand, because why bother with a special trip? This recipe is adapted from one of my favorite cookbooks, America's Best Lost Recipes from the Cook's Country people. It is a wonderful book full of all kinds of unusual recipes that come from the traditions of immigrants to the U.S., and home grown dishes, too. I highly recommend getting your own copy.

Recipe for Runzas

Dough
3/4 cup warm water
1/2 cup sweetened condensed milk
1/4 vegetable oil
2 Tbl Sugar
1 large egg
3 1/2 cups flour
2 packages instant yeast
1 tsp salt
2 tsp Shirley J dough enhancer (optional, but it helps!)

Filling
3 Tbl unsalted butter
1 1/2 lbs ground beef
1 medium onion, chopped
1/2 small head of cabbage, cored and chopped (about 3 cups)
Spices such as paprika, oregano, allspice, sage, rosemary, cayenne, or thyme (depends on your taste)
Salt and Pepper
10 slices of deli American cheese
Optional: chopped green olives, hardboiled egg, minced carrots or celery

For Dough:
Mix water, sweetened condensed milk, oil, sugar, and egg in a bowl. Place flour, yeast, and salt into the bowl of a stand mixer and whisk a little to combine. Fit the mixer with a dough hook. Add water mixture on low until dough comes together. Increase speed to medium and mix until smooth and shiny, about 4-6 minutes. Shape dough into a ball and place into a greased bowl (I usually clean the mixing bowl and grease that.) Cover with plastic wrap and let rise in a warm place until doubled in size, about an hour.

For Filling:
Melt 1 Tb butter in a large skillet over medium high heat. Sweat the onions until softened, add the ground beef and cook until just browned, about 6 minutes, breaking up large clumps, salt and pepper to taste, spice the meat as you like. Transfer the beef to a paper-towel lined plate. Pour off all but 2 Tbl of fat from the pan and add the cabbage. Salt and pepper it, add spice, toss until just beginning to wilt, about 2-4 minutes. Return beef to the pan and adjust seasonings. Remove from heat and put into a bowl to cool slightly.

To Assemble and Bake:
Line two baking sheets with parchment paper, turn on oven to 350 degrees with oven racks in upper middle and lower middle positions. Punch down and divide the dough into 10 pieces. Working on a lightly floured surface, roll each piece of dough into a circle, trying to keep the middle higher than the edges. Place dough round into a small cereal bowl and line it with a slice of cheese (sometimes I need to break the slices to fit in the bottom.) Spoon about 1/2-3/4 cup of filling over the cheese and pinch up the edges of the dough together to form a bun (I usually pinch opposite edges together, until the runzas come together. Place the bun on the parchment lined pan. Repeat with the remaining buns until 9-10 buns are on the sheets. Cover with a clean cloth and let rise in a warm place until puffed, about 20 minutes. Bake in the oven until golden brown, about 20 minutes, switching and rotating the pans in between the racks halfway through baking time. Brush the warm buns with melted butter and serve. Runzas keep nicely wrapped in foil in the fridge for several days, or you may wrap them individually in plastic wrap and freeze them, defrosting in the microwave as you'd like.


Thursday, April 26, 2012

I'll Bring You France


I have been trying to be better about getting to know my neighbors and making friends where I live. I made it a point to go to the mid-week church activities, including a quilting bee.

"A quilting bee?" asked Joe.
"Yes."
"Like a spelling bee?"
"I suppose...maybe it means a group of people getting together to work on one thing?"
"But wouldn't that be a spelling hive? Or a quilting swarm?"
"...You've got me on that one."

So it was, at quilting hive, that one of my neighbors discussed the newest chicks added to her brood of chickens. While the idea of keeping chickens is an anathema to me, I have no problems with any, or all, of my neighbors keeping them. They could even have a rooster; it couldn't be any worse than the outdoor parrot several houses away (that thing's cries echo off the mountains, my friends, piercing a Saturday morning like a gun shot.)  My neighbor, who is naturally energetic and a mile-a-minute, divulged her love of Pinterest and finding egg recipes. I volunteered a few ideas while composing my block. It was a lovely night and I'm glad I went. 

The door vibrated with a knock this morning, and I shuffled in my house coat, channeling Phyllis Diller, to find my neighbor holding a dozen fresh, very fresh, eggs. They were gorgeous: malt, seafoam, light moss, and cafe au lait. Little shavings of bedding crowned a few. When I broke them open, the orange yolks slayed me (like all good backyard eggs.) It's such a disappointment to crack a commercial egg after that, with its pale, sodden, winter sun of a yolk. 

My friend Becky posted Dorie Greenspan's French Lemon Cream Tart a few days ago. I couldn't think of a better use for those fresh eggs (and an obscene amount of butter, positively graphic.)

So I made two, one for us and one for my neighbor, because that's how I roll. Bring me eggs and I will bring you France. Bring me butter and I'll bring you England. Bring me chocolate and I'll bring you Mexico. Bring me sugar and I'll bring you heaven.


And wouldn't you know, when I left the tart,

she handed me a dozen more eggs for the walk home.

Friday, September 16, 2011

Best Roasted Salsa Recipe Ever

This is the time of year when I love to make salsa. The fresh peppers and tomatoes are at the height of deliciousness. Salsa is fast, healthy, tasty, and there's no wrong way to make it. (Well, there is, I just don't care to list the ways.)

Ingredients:
Peppers 
Tomatillos
Tomatoes
Jalapeno
an Onion
some Cilantro
Salt
one Lime
Liquid Smoke 

BUT WHY DIDN'T YOU SAY HOW MANY OF EACH?

Because it doesn't matter. Geez, relax. I used Anaheim, Bell, and Jalapeno here. Use whatever you can find at the store or stand that looks beautiful and is on sale.

TOMATOES?

I used 4 or so in this recipe. If you aren't buying your tomatoes in July, August, or September, just use drained canned tomatoes. Don't make salsa with gross tomatoes you bought from the store in February. And you wonder why your kids hate tomatoes. 


Put your assortment of washed peppers and tomatillos on a baking sheet. 

 Broil them for a few minutes until charred. This is not the time to walk away, you'll need to flip the peppers and remove them individually when done. The tomatillos may collapse and leak. Don't freak.


When done, put your tomatillos aside, and put your peppers in a Ziploc and seal. Morally opposed to Ziploc? You can use any container (tupperware, glass) that has a lid you can seal. You're steaming the peppers so you can remove their skins easily. Leave to cool for 10-15 minutes. You can even leave them overnight, I'm not your mom. After they've cooled, you'll be able to slip their skins off*, and clean out the pulp and seeds--especially important if you want that Jalapeno to add pleasant heat instead of barn-burning heat.

*One time I was all "Oh, let's skip taking the pepper skins off because I'm busy." That salsa had a bitter, nasty flavor; it was inedible. Take the skins off.

Get out your food processor.


Put in your small or medium yellow or red onion and process until chopped. Add a handful of cilantro. I'm not the cilantro police--put in as much or as little as you like. Whirl up the cilantro with the onion until it's all finely chopped. Let it fall into a bowl.


Process the tomatillos and add to the bowl. Process the peppers until also finely chopped. Do the same with the tomatoes. If it's looking a little soupy and you don't like watery salsa, drain it a bit with a fine-mesh sieve. Add half a lime and kosher salt until you like how salty it is. Maybe add a pinch of sugar for balance.

And here's the secret: Liquid Smoke! Add a couple drops to your salsa, it's delicious! If you don't have Liquid Smoke, who cares, don't add it. Keeps for a week or so in the fridge.

Other things you can add if you feel like it: 
Red jalapenos
Mangos
Peaches
Avocados
Pinch of chili powder

Enjoy!

Thursday, July 28, 2011

I Worry About Pie

I do.

I worry about pie.


I worry that we're going to lose pie making.

I'm not worried about cakes. Yes, box mixes are a different animal than from-scratch cakes, but people are still making cakes. Pie making is dying. Honestly, when was the last time you actually made a pie from scratch, the whole thing? The pre-made graham cracker shells, boxed and canned fillings, frozen dough, and cool whip, people just don't make pies anymore. I even hear the heresy that there are people who don't like pie. Well of course they don't like pie, if all that pie means is frozen, boxed, packaged, and canned sludge.

It feels like pie makers are going to the grave with all their secrets. Across America, your aunt or grandmother, neighbor or church lady, have a lifetime of pie making that no one is bothering to learn. Because pies are regional, and the secrets to making them depend on local conditions and ingredients, these women are the repositories of baking magic. Pecan pie is made where they grow pecans. Apple pie strongholds in the north east and north west, wouldn't you know it, where they grow apples.

From the way I hear you tell it, the scariest thing in the world is pie dough. But don't let it scare you out of making pie. There's something so satisfying about the challenge of pie dough. Will you get the ratio right? Will it be too warm or too cold? Will it tear as you transfer it to the plate? I suspect it's those kind of questions that keep people from making their own pies, but that's the adventure! I've been making pies for almost 30 years and I still don't get it perfect, but I always try.

So what's the secret? Keeping it cold. When the recipe says chill the dough, really chill it. Chill the pie plate after it's filled with dough, too. Don't get it out of the icebox until you're really ready to fill and bake. Where I live the air is so dry that pie dough needs more water than the recipes call for. As for the filling, there's no right or wrong answer, but if I could nudge you, it would be to make pies that mark the season: strawberry pies in June, apricot in July, peaches in August, apple in the Fall. No more lovely way to mark the passing of a calendar than to make a pie.

My dad is the pie maker in the family. His pumpkin pie is legendary (shh, he uses the recipe on the back of the Libby's can.) Mincemeat and apple are his other specialties. He'll tell you that the best apple pies are made of Rome pples. My mother-in-law swears by McIntosh. Every region knows a different most delicious apple for pie. I've even heard of fights over a double crust apple vs. a crumb-topping apple.

My specialty is coconut cream. Oh, it's so, so good.


We can't lose pies; it's Un-American. That's what the House Un-American Committee should have been about: how to stop pie loss.

So ask your grandmother, your neighbor, the church lady to help you know the pie-making secrets in your corner of the country. What's your regional specialty? Shoo-fly? Banoffee? Mulberry? Sour cream lemon? Whatever it is, I want you to make a pie for real, from scratch. For extra credit, look around your neighborhood or farmer's stand and pick what's bursting in season this week. And for heaven's sake, whip some real cream.

Will you?


The first pie pictured is apricot. It's my personal favorite because it's not only easy, it's out of this world delicious. The recipe is a variation on Ruth Reichl's apricot pie:


Apricot Pie


Chilled pie dough in a 9 or 10" pie plate
2 lbs fresh apricots
1/4 cup flour


Topping:
1 stick butter
3/4 cup sugar
3/4 cup all-purpose flour
1/2 tsp salt
1/2 teaspoon grated nutmeg


Preheat oven to 400ºF with rack in lower third.
Pull apricots (with skins) apart into halves, throw away pits. Melt butter in a small saucepan over medium heat, then stir in sugar, flour, salt, and nutmeg, and remove from heat. Cool mixture until firm enough to crumble, 10 minutes. Toss the apricots with 1/4 c of flour, just to coat them, discard the extra flour. Put apricots in pie shell (I like to stand them up on their ends, overlapping them slightly,) crumble butter mixture on top. 


Bake the pie, with a foil-lined baking pan on rack below it (to catch drips), 10 minutes.


Reduce oven temperature to 350ºF and continue to bake until top is golden, 50 minutes to 60 minutes.
Cool pie to warm or room temperature on a rack, serve with fresh whipped cream or vanilla ice cream.

Wednesday, April 13, 2011

Spanish Tortilla

I make this thing called tortilla. Why? Because my mom made it, my abuela made it, her abuela made it (when they had oil. And when they had no oil, they ate sand.)

Chances are that if you've been to my house for breakfast or brunch, you've had a slice.

I always have people ask how to make it (along with the garlic aioli) so I put the recipe together for Marie over at Make and Takes.


It's totally authentic. It's perfect for spring, summer, or because you heart easy food. It's how we roll in España.

How to make Spanish tortilla!

Thursday, April 07, 2011

Proximo's 4th Birthday!


His body is lengthening, limbs stringing out, knobby-inside knees that are mine. He looks older.

Most days he hangs on me like a stole. Today, as I sat at the table helping his brother with homework, he climbed to the top of the chair and leaned over my head, stretched his arms around my neck, and made a right angle.

Have I told you that 4 is my favorite? It is. It's my favorite age. 4 is the reward for the hard work of 2 and 3. It's before the emotional neuroses of 5.

He planned his birthday party himself. We were going to a park, there would be balloons, and lots and lots of friends.

We disagreed about the cupcakes. I wanted them, he didn't.
"NO," He said, frowning* at me, "I want a CAKE."
"But a cake will be hard to cut for your friends at the park."
"NO."
"Look! Here are a bunch of cupcake liners, red, blue, green, and you can pick which ones you want if you have cupcakes! If you don't like them, I'll make a cake." After some consideration, and another frown, he conceded, ".....FINE. Red AND blue."


Devil's food with raspberry filling and marshmallow tops. They were ridiculously delicious, and I don't even like cake.


So many friends to play with! Not having to be the tag-along little brother! Friends just for him!


You see that black haired vixen? That's his crush. He made her a special Valentine. He calls her "Weesabella."

Proximo decided he wanted to ride home with his Tia Jeffiner. This is what happened in the parking lot on the way to the car:
Tia Jeffiner, "So, Weesabella is fun, huh?"
Proximo, "Yep, she's fun."Jeffiner, thinking she's digging a little deeper, "She's kinda pretty, too, huh?" Proximo stops and gives her the famous frown* and says,
"Weesabella's prettier than you."
Jeffiner gasps, "What? No, she's not."
"Yes, she is."
"No, I'm Tia pretty."
"No, she's jus prettier."
We're just different kinds of pretty."
"NO."

3 months

1 year


18 months

2 Years

3 Years

4

(*the famous frown)


Happy birthday, baby!

The beautiful birthday party pictures were taken by Tia Jeffiner, the Fotohok, who's an amazing photographer, and available for your kid's birthday, or other life event.

Friday, November 26, 2010

Fortune Favors the Grateful

My Loves,

Did you know your prayers, candles, and Budda-bellies worked? Consider yourselves officially part of a miracle. Thank you.

In point of supernatural fact, this whole week has been full of small graces and kind wonders. Wednesday was full of bounty: from Izzes dropped by the manse, to people dropping everything to make a child's Christmas unforgettable. The devastation we see all around us, the mire of this world, is lightened by how we care for each other. You have cared for me.

And did I mention the Marvel of the Red Lentils? I made red lentil soup and the children had three helpings a piece? It was a phenomenon of the first order; I'm submitting to the Vatican.


(Smoked ham hocks simmered for an hour in water. Saute carrots, celery, onion, turmeric, pimenton [smoked paprika] in a little olive oil. Pour the ham broth in with the veggies, add two cups of red lentils. Take the meat off the hocks and add back into the soup. Season with salt and pepper. You could sub a holiday ham bone for the hocks.)

And now, to pass along the love, the Lower Lights Winner:

Single Pot Josh! You're the winner! Now all you need is hope against all reason that I'll go to the post office someday.

I hope your Thanksgiving was even more lucky than mine.

Monday, November 22, 2010

How to Make Real Homemade Stuffing and Throw Away the Stove-Top

My Dear Loves,

It came to my attention recently that some of you might still be reaching for that box of Stove-Top during this glorious time of year. This breaks my heart. Do you know what's in boxed stuffings? Weird stuff, that's what. It's time to make your own stuffing. You can make homemade stuffing! It is so easy! And you can control what's in your stuffing, making it to your taste and even healthy (or not healthy, I'm not your mom.)

The Prep:

1 large paper bag
Leftover bread


I live in the high desert so my prep might be different than yours. When I was a kid, my dad would start collecting bread about three weeks before Thanksgiving. He'd chop up the bread heels we left in the bags, he chopped up stale slices of French bread, whatever we had leftover, and put them all in a large paper bag. He'd shake it once a day or so. In these parts, the bread dries out and does not mold. If you live in a humid place, chop up your breads and put them in a bag in the freezer.


In this bag I have some whole wheat bread, some white sandwich bread, some French bread. What kind of bread should you get? Whatever is leftover, day-old, and cheap. Most stores have day-old bread on a sad little rack to the side of the fresh stuff. If you want it to be healthy, choose whole grain breads. Rye bread? Why not? Croissants? Oui! You can even throw in some leftover cornbread, who's going to tell you no? Not me, I'm an enabler.


The Main Ingredients:

12 cups of stale bread cubes
1 small onion, finely chopped
1 cup of finely chopped celery
1/2 cup red bell pepper, finely chopped
5 sage leaves, chopped
1 small sprig rosemary, chopped
5 Tbl butter (OR 2 Tbl olive oil)
Kosher salt
22 ounces of chicken broth (2 14.5 ounce cans) low sodium is best, but you can use whatever
Buttered 9"x13" pan


Why is there an apple in that picture?

Good question!

That's because stuffing is about what you like. Add some chopped apple and a little sweet to your stuffing? Why not? Use dried herbs if you don't have fresh! Hate rosemary? Try smoked paprika, or any other spice/herb! Leave out the red pepper? OK! Like adding delicious, saturated fat calories because you don't have enough of that in your diet? Render bacon or pancetta and toss in the goodness. Add fennel bulb, roasted chestnuts, pecans, golden raisins, or mushrooms? Absolutely! Carrots? Don't be insane, that's gross. Carrots in stuffing...I've heard everything.

Whatever you decide to add, chop it up small because the bread should be the star.

Trying to be healthy? Use the two tablespoons of olive oil instead of the butter.


Melt the butter in a large pan. Add the onions, sprinkle with salt. Saute for five minutes on medium-low heat. You don't want to brown the onions, just soften them.


Add the celery, bell pepper, sage, rosemary, and sprinkle with salt, maybe even some black pepper. Saute over medium heat for two or three minutes until it smells amazing and the veggies are starting to soften. If you're the type of cook who adds half a cup of white wine to your stuffing, now's the time, and reduce it to cook out the alcohol. No wine in mine today.

Put the bread cubes into a large bowl (large enough to hold 12 cups.) Pour the veggies over the bread and toss. Add the chicken stock. You can use homemade, of course. Your bread might need another 1/2 cup or so of chicken stock. Taste your bread and veggies. Does it taste good? The chicken stock will soak the bread and evaporate, so don't put too much salt.


Toss the bread and the stock, and pour into a 9"x13" pan that's been brushed with melted butter. How? I put a tablespoon of butter into the pan, stick it in the oven for a minute until it melts, and then brush it around the pan. Want healthier? Spray with a little cooking spray. Actually going to use it to stuff your bird? Go on with your bad self! (It won't all fit, you'll need to split half into a small oven-proof dish to bake.)


Look at that! Your stuffing is ready to hit the 350 degree oven for about an hour. About? Yes, about. I don't know how hot your oven really is and I don't want you to burn your stuffing. Start checking the stuffing at 45 minutes. Mine took a full hour. Maybe because I took a nap and couldn't wake up in time to check at 45 minutes.


Ooooooh! Look! It's golden brown and moves slightly when you take it out of the oven!

Don't try to eat it right away, let it sit at least 15 minutes before you start spooning it out.

Check you out, you made stuffing!

Saturday, August 28, 2010

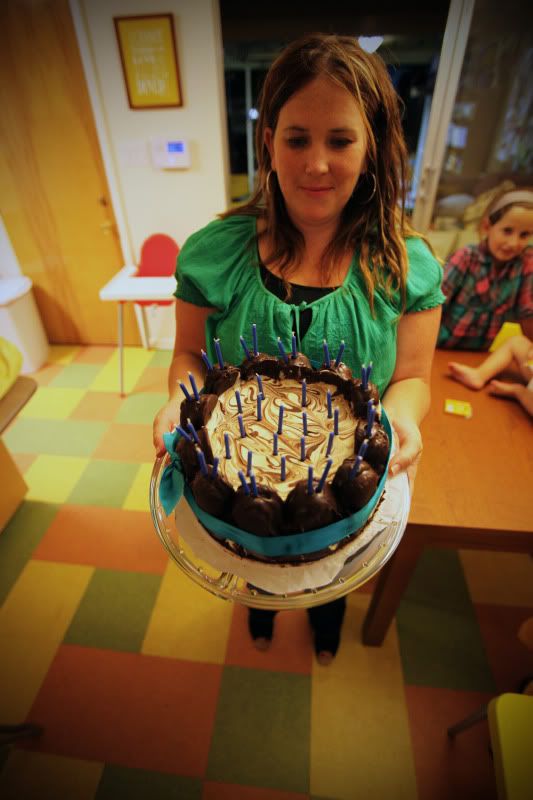
Chocodile Charlotte Birthday Cake

Let's nip this thing in the bud: I made up the Chocodile Charlotte because cjane asked me to.

It's kind of our thing; she asks me to do something and then I do it.

(She does my dishes in return, so we might have a good thing going.)


photo from cjane

A charlotte is a dessert where a pan is lined with some type of cake slices, a stabilized cream of some sort is poured into the center, and the whole thing is refrigerated until set.

Here's how we made the charlotte:

(Please forgive me for any omissions or errors since I didn't take precise measurements, I just put it together until it looked right. Use your good baking/cooking judgement at all times and keep your hands to yourself.)

10" springform pan
16 Chocodiles

Bavarian Cream:
2 cups milk
1 vanilla bean
6 egg yolks
Dash salt
2/3 c. sugar
1 tsp unflavored gelatin (I think, it was most of a little packet of gelatin)

Bring the milk up to a boil (do not let it scorch!) and add the split vanilla bean and salt. Remove from heat and cover, steep for 10 minutes, strain out the bean. Beat the yolks with the sugar until a thick ribbon forms. Add the milk gradually until combined, pour back into pot and stir over medium heat until thick and ALMOST boiling (DO NOT BOIL.) Bloom the gelatin (sprinkle over a couple tablespoons of water and let stand for a few minutes, heat in micro for 20-30 seconds until melted) and add to still warm cream. Cool cream slowly by pouring into a bowl set over an ice bath and whisk.


Chantilly:
2 cups heavy whipping cream
1/2 c powdered sugar
1/2 tsp vanilla
1.5 tsp gelatin (most of another packet of gelatin,) bloomed

Beat all ingredients in a stand mixer until stiff peaks form.

Chocolate Ganache:
Good quality chocolate (we used a mix of a Lindt milk chocolate bar and semi-sweet chocolate chips)
Equal amount of cream to chocolate by weight

Heat the cream and add chopped chocolate. Stir until thoroughly melted, refrigerate until thick but still pourable (an hour or two.)

To assemble:
Slice three or four Chocodiles horizontally into at least halves, thirds would be best. This will be messy. Probably easier to freeze them a little at first. Line the springform pan bottom with parchment. Also cut a 7" strip that will fit around the springform like a collar, taping in place if you need. Lay the strips of cut Chocodiles, chocolate side down, in the bottom of the pan. Cut a little off the end 12 Chocodiles (so they have a flat bottom) and set them vertically around the pan. If you're feeling fancy, you can brush some of the ganache around the Chocodiles to seal the edges and pour some into the bottom to coat.

Gently fold the Bavarian into the Chantilly. Fill the prepared Chocodile-lined pan with the cream, spooning in the ganache to create layers. Drop a few drizzles of ganache on the very top of the cream and drag a sharp knife to marble the top. Refrigerate for 4-6 hours until completely set.

To serve: release the springform ring, remove the paper, tie with a ribbon, cut into wedges.


Thursday, August 26, 2010

Thai Spring Cream Rolls

Tonight I made Veeda's Thai Spring Rolls for dinner. Here are the wrappers you use for spring rolls; they're thinner and larger than egg roll wrappers and quite light.


I ran out of filling with two spring roll wrappers left. I didn't want to throw them away, so I opened the fridge to see if there was some fruit I might fold into the wrappers for a fun treat. All thoughts of fruit flew out of my head when my eyes landed on the vanilla pastry cream I'd accidentally* made the night before.

I spooned the cold vanilla cream onto the pastry and rolled up the wrapper. I carefully sealed the edges as I went with egg white because compromising the border could lead to mass chaos in the pan.

And then I fried those suckers for a minute or two in the hot leftover oil.


France met Thailand in a sinful tumble.

Oh, man. Crispy and smooth.


WHAT HAVE I DONE?


They were unbelievable.

Recipe

Make a vanilla pastry cream:
2 cups milk
1 split vanilla bean
2/3 cup sugar
4 TBL cornstarch
Dash salt
6 egg yolks
Boil milk and vanilla, remove and let steep. Strain bean out of egg. Beat yolks and sugar 'til ribbon forms. Add cornstarch. Slowly add hot milk and return to stove and cook until thick.
Cool it thoroughly.
Spoon cream into spring roll wrappers. Roll and seal with brushed egg white. Fry until golden.


*Yes. I know, I'm the only person you know who accidentally makes pastry cream. I used a vintage French cookbook from the famous Lenôtre. The recipes are plain with very little to distinguish them. I'd been making a Bavarian cream for a dessert that cjane and I were due to assemble, when the pages flipped and I didn't notice. Just like

Joey

Rachel in the famous beef-peas-onions-cake-trifle, I started one recipe and finished another. The ingredients were almost the same except one had cornstarch and one didn't, plus or minus some prep steps. So I put the pastry cream into the fridge and started the Bavarian cream over (6 MORE egg yolks.)


Tuesday, July 13, 2010

Untipsy Tuesday: Brazilian Lemonade

I first imbibed this drink at our local churrasco joint. It was like falling into delicious, sweet, tart love. I knew the main ingredient had to be sweetened condensed milk (which might save civilization if we let it) and some sort of citrus.

What I didn't know, until my friend Miggy spilled the beans, is that the process is as important as the ingredients.

So in honor of Miggy and her sweet new baby and for the arrival of summer heat....


Brazilian Lemonade

5-8 limes
1 can of sweetened condensed milk
20 ounces of water

A GOOD blender
A strainer
A pitcher


Cut the limes in half, juice them a little into the blender, but not thoroughly, add the halved lime carcasses to the blender. You can quarter your limes if your blender is weak. Pour in the can of sweetened condensed milk (be careful not to cut your tongue if you attempt to lick the top of the tin.) Add about a large glass of water. The amount of water doesn't matter right now, just leave a couple inches of room in the blender for expansion. BLEND THAT SUCKER.

Action shot!

The whole thing, rinds and all, until as smooth as possible. See, the blender extracts all those lovely essential oils in the rind.

Pour the concoction through the strainer into the pitcher in a couple batches, pressing the pulp for maximum flavor. Discard the pulp as you go.

Add another 20 ounces of water, or so, to the pitcher. The mocktail should be like milky water, not thick. Taste it. Too strong? Add more water. Too sweet? Add more lime juice. Serve over ice.

And unlike other drinks or mocktails, when the ice melts, the Brazilian lemonade is even more refreshing.


Garnish ideas:
Lime slice (duh)
Mint (if you have it)
Spearmint (if you have that but not mint)

NO GARNISH (because you live on the edge and need no such frippery)


Addition ideas:
Cream of coconut
Grapefruit chunks
Lemon chunks

Go, make, and fast!